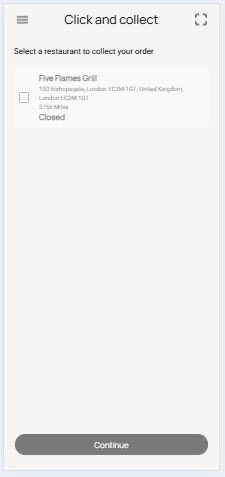
This guide will help you understand how to add new menu for click and collect from backend portal.
How to Add a New Menu? #
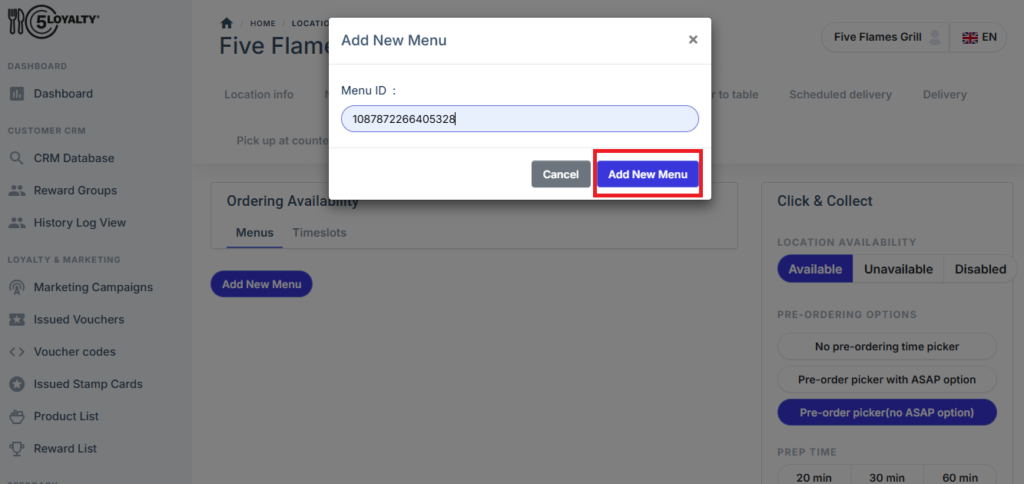
- Navigate to the Click & Collect tab.
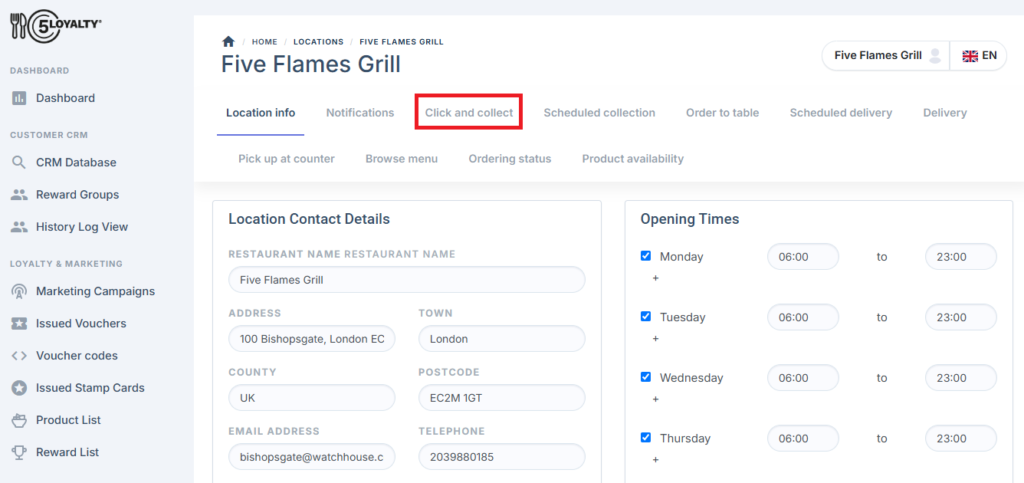
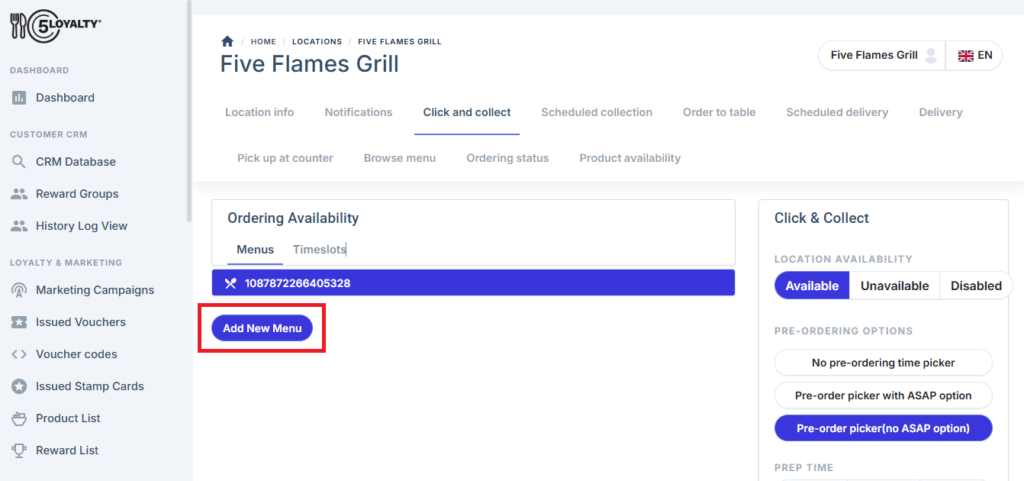
- Click the Add New Menu button.
- A popup will appear—enter the Menu ID in the provided field.
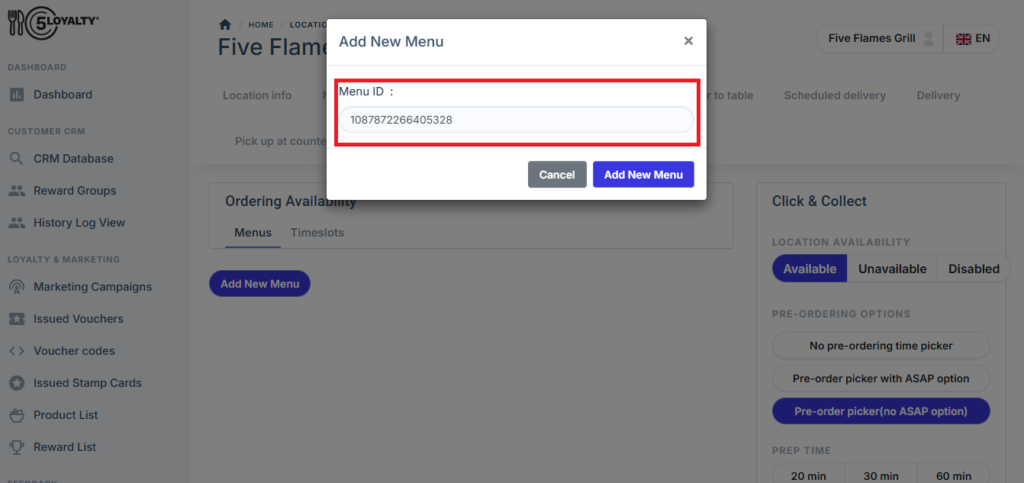
- Click on the Add New Menu button. Your new menu will now be added.

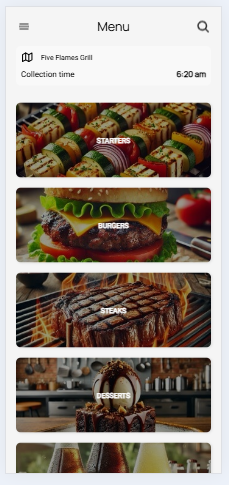
Menu Presentation to Customers on the App
The app’s menu will be displayed in a user-friendly, visually appealing interface designed to enhance the customer’s browsing experience. Key features include:
Categorized Layout:
The menu items will be organized into clear categories (e.g., Starters, Main Course, Desserts, Beverages) for easy navigation.
High-Quality Images:
Each menu item will be accompanied by a high-resolution image to give customers a visual representation of the dish.
Detailed Descriptions:
Each item will feature a brief description, including ingredients, portion size, and any dietary information (e.g., vegan, gluten-free).
Pricing Information:
Clear and transparent pricing will be displayed alongside each item.
Customization Options:
Customers will have the option to customize their orders, such as selecting portion sizes, choosing toppings, or specifying dietary preferences.
Search and Filters:
A search bar and filters (e.g., price range, vegetarian options) will allow customers to find their desired items quickly.
Add to Cart Functionality:
A prominent “Add to Cart” button will enable customers to select items seamlessly.
Real-Time Availability:
The app will update item availability in real-time to avoid orders for out-of-stock items.
How to Remove a Menu? #
- Click on the Remove This Menu button next to the menu you wish to delete.
- A confirmation popup will appear. Click Yes to confirm. Your menu will be removed.
If menu is removed, the app will temporarily display the restaurant as Closed to customers.
